Learn How to Stretch a Canvas with Evan Woodruffe
Today, I attended a fantastic training session led by Mr. Evan Woodruffe, the product specialist at Gordon Harris. As an artist with a vast range of expertise, Evan shared essential tips on how to stretch a canvas from start to finish. Whether you’re a beginner or an experienced artist, this step-by-step guide will walk you through the process of making your own canvas, including important tips for perfecting the tension and finish.
Training Session Recap: Learn How to Stretch a Canvas with Evan Woodruffe
Today, I had the pleasure of attending a fantastic training session led by Mr. Evan Woodruff, the product specialist at Gordon Harris. As an artist with vast expertise in art supplies, Evan shared essential tips on how to stretch a canvas from start to finish. Whether you’re a beginner or an experienced artist, this step-by-step guide will walk you through the process of making your own canvas, including important tips for perfecting the tension and finish.
Materials You’ll Need:
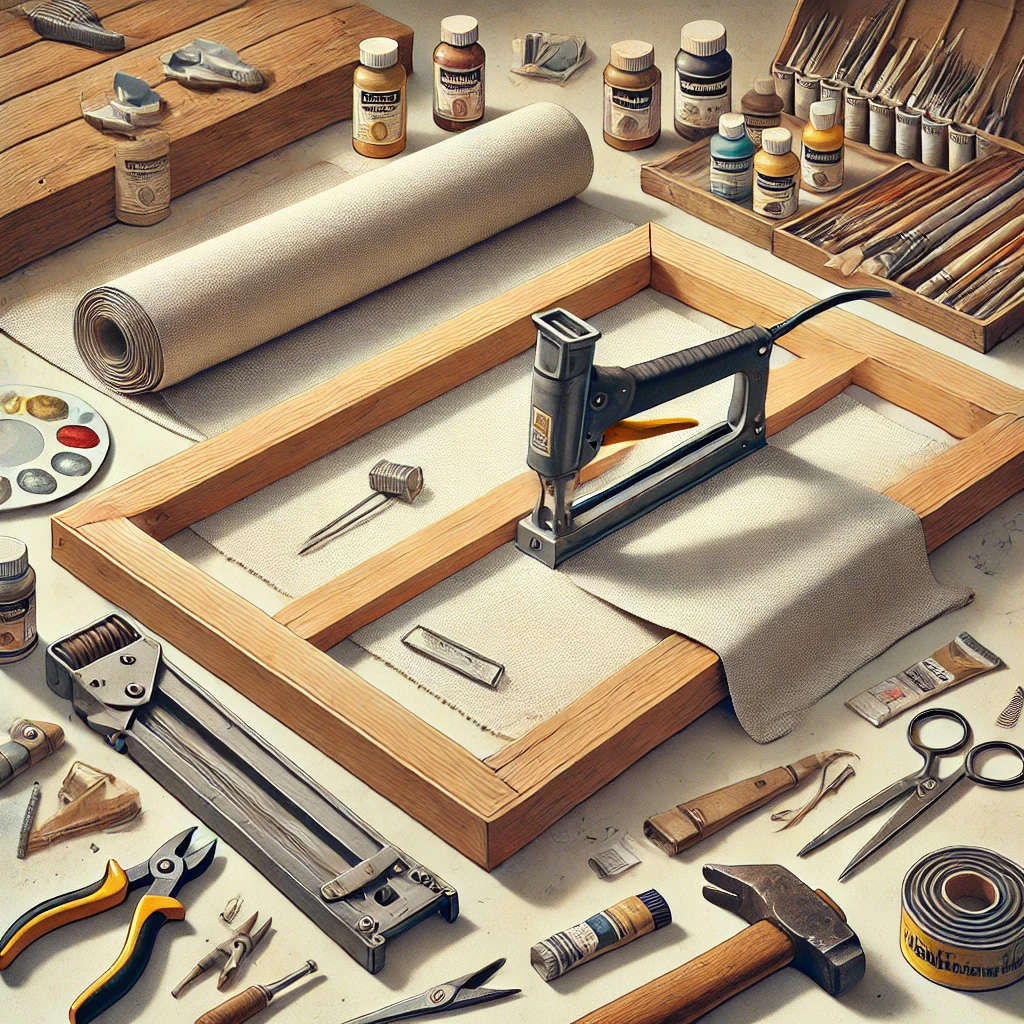
- Stretcher Bars: Wooden pieces to form the frame, available in various sizes and profiles to suit different canvas dimensions.
- Canvas Fabric: Cotton or linen, either pre-cut to your desired size or in a roll. Choose the fabric based on your medium (acrylic, oil, watercolour).
- Staple Gun: A medium-duty tool that securely attaches the fabric to the stretcher bars. This makes the canvas stretching process quick and efficient.
- Canvas Pliers: Optional, but useful for ensuring the fabric is pulled tightly across the frame, creating proper tension and preventing sagging or wrinkles.
- Staple Remover: Handy for adjusting or removing staples if you need to re-stretch the canvas or fix any mistakes.
- Scissors: Used for cutting the canvas fabric to size and trimming any excess fabric at the corners. Specialized canvas shears are best for clean, smooth cuts.
- Rubber Mallet: Essential for securing the stretcher bars into place and ensuring the frame is assembled tightly. A rubber mallet helps prevent damage to the wood while ensuring a snug fit.
Step-by-Step Instructions:
1. Prepare the Frame:
Start by assembling the stretcher bars into a rectangular or square frame.
When assembling, use a Rubber Mallet to gently tap the frame’s corners, ensuring the bars fit snugly together. This tool helps avoid damaging the wood and ensures a firm connection.
Note:
If you’re working with a larger canvas or want to ensure extra durability, consider adding Pine Braces to the stretcher bars. These are wooden supports that fit into the back of the frame, providing additional strength and stability, especially for larger canvases that might sag over time. Pine Braces are easy to install and can be a helpful addition for any canvas you create.
2. Cut the Canvas:
Lay the canvas fabric out and place the frame on top. Cut the fabric, leaving about 3-4 inches of extra fabric on each side to wrap around the frame. This will give you enough room to pull the fabric tightly and secure it.
3. Attach the Canvas:
Lay the frame face down on the canvas and make sure it’s centered.
Start stapling from the middle of each side. For each side, staple at a 45-degree angle to secure the fabric tightly. Start with two staples near the center of each side, forming a diamond shape once all four sides are done. This step ensures even tension across the canvas.
Work your way outward from the middle toward the corners, keeping the fabric tight. Canvas pliers can help grip the fabric and create even tension.
4. Fold the Corners:
Once all sides are stapled, it’s time to fold the corners neatly, like wrapping a gift.
Before folding, use scissors to trim any excess fabric at the corners. This will help ensure a clean fold. Fold the corners into triangular flaps and staple them down for a professional, clean finish.
5. Final Adjustments:
Once the canvas is stretched, check its tension. If it feels loose or uneven, use a Staple Remover to adjust the fabric. The RAPID STAPLE REMOVER R3 HEAVY DUTY is perfect for this task, allowing you to remove staples without damaging the fabric or frame. After adjusting the fabric, retighten and staple again to ensure a smooth, taut surface.
Optional: Using Canvas Stretching Wedges:
For an extra-tight stretch, you can use Canvas Stretching Wedges. These small triangular wood pieces are inserted into the corners of the frame and tapped in with a hammer. They push the stretcher bars outward, adding more tension to the canvas. While optional, this step can be useful for achieving a firm, smooth surface.
Conclusion:
Making your own canvas is a satisfying and straightforward process. With the right tools—such as a good staple gun, canvas pliers, and staple remover—you can create a tight, smooth surface for your artwork.
This training session with Evan Woodruffe, the product specialist at Gordon Harris, taught us so much about canvas-making. As an experienced artist with a deep knowledge of art supplies, Evan helped us understand the process more clearly. His expertise in a wide range of products makes him a fantastic resource, and I’m excited to share these tips with you.
Ready to try it? All the tools you need are available at our store, and I’m here to help you pick out what’s best for your project.
You May Also Like

How to Glaze Air Dry Clay for a Glossy Finish
28/02/2025
The Ultimate Guide to Different Types of Clay and Their Uses
30/01/2025

